Introduction to DIY Lip Scrubs
Lip scrubs have become a beloved staple in many beauty routines, offering a simple way to achieve soft, luscious lips. While store-bought scrubs are widely available, making your own at home with kitchen ingredients is an easy, affordable, and natural alternative. DIY lip scrubs not only allow you to control what goes onto your skin but also add a fun, creative element to self-care.
Why Use Kitchen Ingredients?
Using ingredients from your kitchen to create lip scrubs makes perfect sense. These items are often organic, free from harsh chemicals, and immediately accessible without an extra trip to the store. Plus, they usually come with additional benefits—think natural moisturizing properties or delightful aromas that enhance the experience. With simple staples like sugar, honey, and oils, you can whip up a nourishing scrub that’s gentle yet effective.
Benefits of Lip Scrubbing for Smooth Lips
Our lips are delicate and often prone to dryness, chapping, and flaking. Regular exfoliation through lip scrubs helps remove dead skin cells, revealing fresh and smooth skin underneath. This makes lipstick application smoother and longer-lasting while preventing cracking and discomfort. Beyond aesthetics, keeping your lips exfoliated can improve comfort and overall lip health, especially during harsh weather or dry seasons.
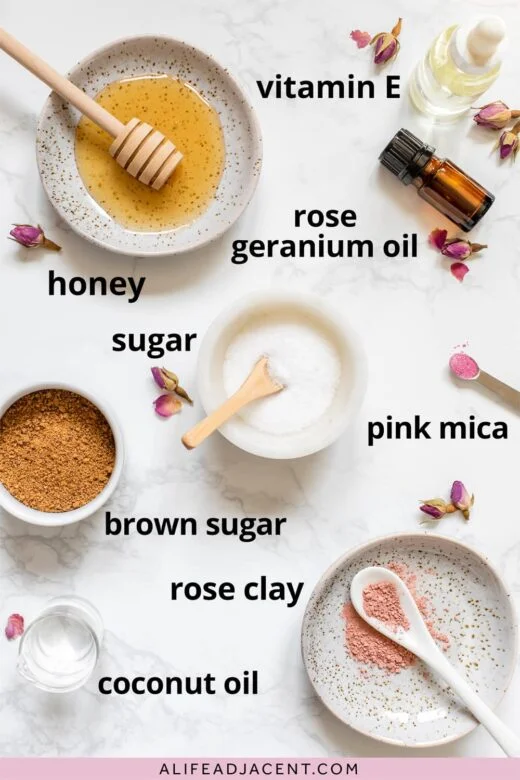
Essential Kitchen Ingredients for Lip Scrubs
Natural Exfoliants: Sugar, Salt, Coffee Grounds
The key to any lip scrub is gentle exfoliation, and kitchen staples like sugar, salt, and coffee grounds fit the bill perfectly. Sugar granules are the most popular choice, offering a soft yet effective exfoliation without irritating sensitive lips. Salt is slightly coarser and best used in smaller amounts or mixed with soothing agents to avoid over-exfoliation. Coffee grounds, meanwhile, add a unique texture and a mild antioxidant boost, leaving lips feeling fresh and rejuvenated.
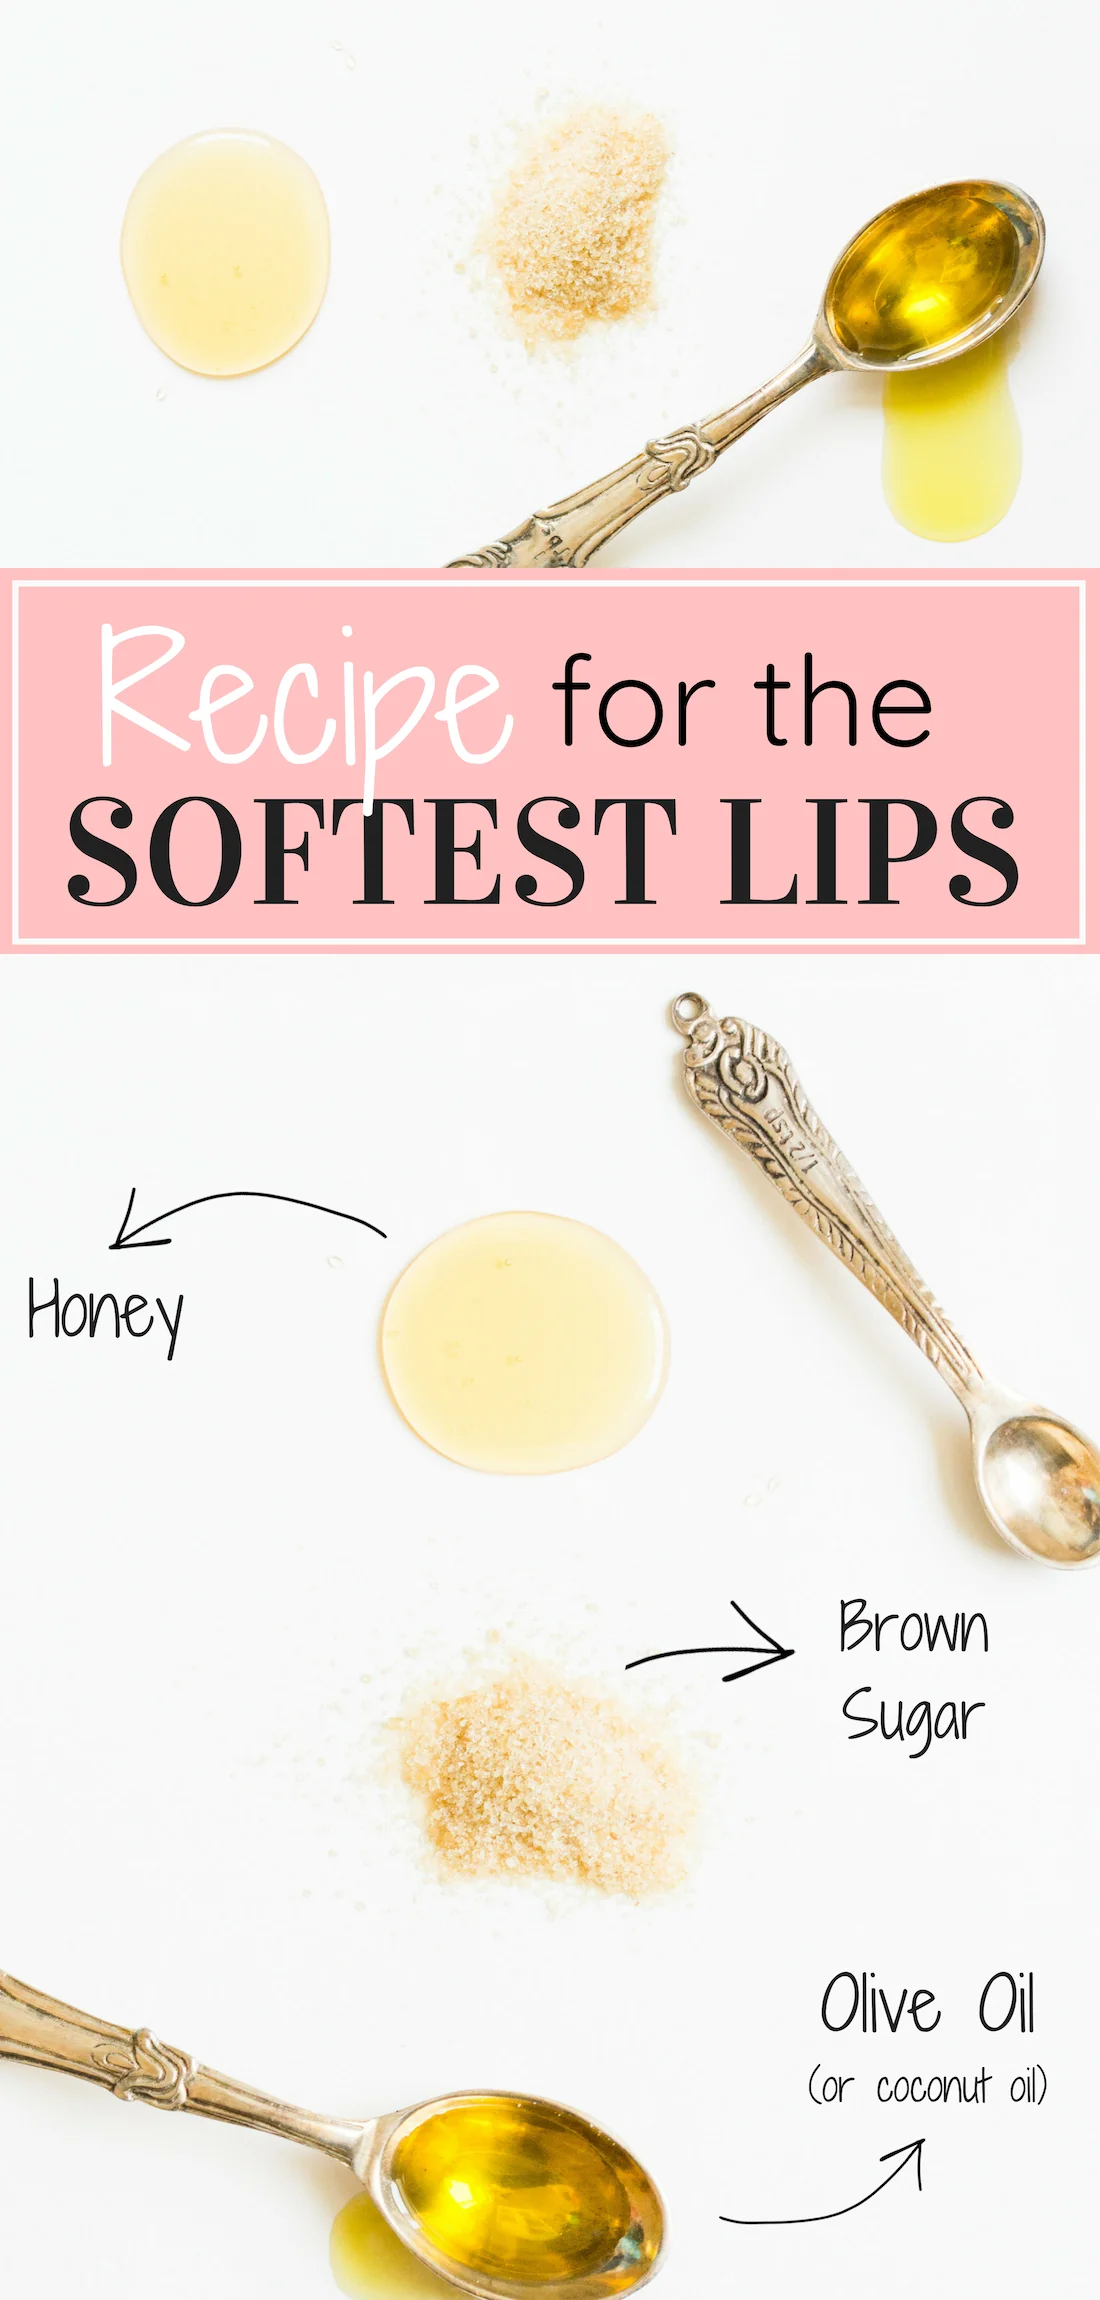
Moisturizing Agents: Honey, Coconut Oil, Olive Oil
Exfoliation alone isn’t enough; moisturizing ingredients help soothe and nourish your lips after the scrub. Honey is a classic choice because of its natural humectant properties, drawing moisture into the skin while providing antibacterial benefits. Coconut and olive oils are rich in antioxidants and fats that deeply hydrate and create a protective barrier against environmental stress.
Flavor and Aroma Enhancers: Vanilla, Cinnamon, Mint
Adding flavor and aroma enhancers not only makes your lip scrub smell divine but can also offer slight therapeutic effects. Vanilla extract brings a sweet, comforting scent, while cinnamon adds a subtle warming sensation that can boost circulation. Mint introduces a refreshing coolness which many find invigorating. These ingredients transform a simple scrub into an indulgent beauty ritual.
Step-by-Step Guide to Making Your Own Lip Scrubs
Basic Lip Scrub Recipe Template
Creating your lip scrub involves a simple ratio: about two parts exfoliant to one part moisturizing agent. For example, combine two tablespoons of sugar with one tablespoon of honey or coconut oil. Mix until you reach a paste-like consistency that is easy to apply but not runny. This base recipe is versatile and easy to tweak based on your preferences or available ingredients.
Recipe Variations for Different Skin Types
Not all lips are the same, so adjusting your scrub can make a world of difference. For sensitive or very dry lips, lean towards finer sugar, gentle oils like olive oil, and soothing honey. If your lips are only mildly dry or you enjoy a bit more exfoliation, adding a pinch of cinnamon or coffee grounds can enhance the effect. Always test a small amount to ensure no irritation occurs.
How to Store and Preserve Your Lip Scrubs
To keep your homemade lip scrubs fresh, store them in a clean, airtight container. Glass jars are ideal as they won’t react with oils and are easy to sterilize. Keep the scrub in a cool, dry place away from direct sunlight. Because you’re using natural ingredients without preservatives, aim to finish your scrub within two weeks. If you notice any change in smell or texture, discard and make a fresh batch.
How to Effectively Use Lip Scrubs
Application Techniques for Best Results
Gently is the operative word here. Use your fingertip to apply a small amount of scrub to your lips and massage in circular motions for about 30 seconds. Avoid scrubbing too hard, as this can cause irritation or micro-tears. After exfoliating, rinse off with lukewarm water and follow up with a nourishing balm to lock in moisture. This simple routine promotes softness and a healthy glow.
How Often to Use Lip Scrubs Safely
While lip scrubbing is beneficial, overdoing it can lead to sensitivity and dryness. Most experts recommend exfoliating no more than two to three times per week. This frequency is enough to maintain smoothness without compromising the natural barrier of your lips. Pay attention to your lips’ response and adjust accordingly. If you notice redness or discomfort, reduce the frequency or choose gentler ingredients.
Creative Lip Scrub Recipes from Your Pantry
Sweet and Soothing Brown Sugar Lip Scrub
Mix two tablespoons of brown sugar with one tablespoon of honey and a teaspoon of olive oil. Brown sugar offers a slightly coarser texture that works well with honey’s antibacterial properties. This combination deeply nourishes while gently exfoliating, leaving lips irresistibly smooth and soft.
Refreshing Coffee and Mint Lip Scrub
Combine one tablespoon of fine coffee grounds with one tablespoon of coconut oil. Add a few drops of peppermint extract for a refreshing twist. The coffee grounds stimulate circulation, while the mint cools and invigorates. This scrub is perfect for a morning wake-up and leaves a subtle, pleasant scent.
Exfoliating Salt and Honey Lip Scrub
For those who prefer a more invigorating texture, mix one tablespoon of finely ground salt with one tablespoon of honey. Salt exfoliates a bit more intensely, so this scrub is best for lips that are not sensitive. The honey counterbalances the salt’s abrasiveness, ensuring your lips stay hydrated and comfortable.
Common Mistakes to Avoid with DIY Lip Scrubs
Over-Exfoliating and Lip Sensitivity
One of the most common pitfalls is exfoliating too frequently or too aggressively. This can damage the delicate skin on your lips, causing sensitivity, redness, and even peeling. Remember, lips need time to renew naturally, so moderation is key. Stick to gentle pressure and limit scrubbing sessions to a few times per week.
Using Ingredients That Can Cause Irritation
Not all kitchen ingredients are safe for every skin type. Avoid harsh spices in large amounts or citrus extracts that can cause burning sensations. Also, be cautious when trying new additives like essential oils; not all are lip-safe and some can cause allergic reactions. Always patch-test your homemade scrub on a small skin area before applying it to your lips.
Conclusion: Embrace Natural Beauty with DIY Lip Scrubs
DIY lip scrubs using kitchen ingredients offer a wonderful blend of convenience, effectiveness, and natural care. They gently remove dead skin, hydrate, and can be customized to suit your preferences and skin needs. By avoiding chemicals and embracing simple, wholesome components, you reinforce healthy lip habits that pay off with smooth, soft, and beautiful lips. So next time you want a little pampering, look to your pantry and create a personalized lip scrub to elevate your beauty routine naturally.

